Space
Keep the approved footprint free of guest tables, service stations, décor, emergency paths, and other production equipment.
 Staff PortalPlan Your Experience
Booked-client planning guide
Use this guide while coordinating with your venue. Your event agreement and RPB’s final production plan always take priority because equipment, outputs, branding, and venue conditions can change the required footprint.
Keep the approved footprint free of guest tables, service stations, décor, emergency paths, and other production equipment.
Provide nearby grounded 120V power. Avoid sharing circuits with catering equipment, entertainment lighting, or other high-load systems.
Reliable venue Wi-Fi is strongly preferred for digital delivery, galleries, microsites, data capture, and live sharing.
Share loading instructions, parking, elevator access, security procedures, venue contacts, and setup deadlines before event day.
Visual planning guides
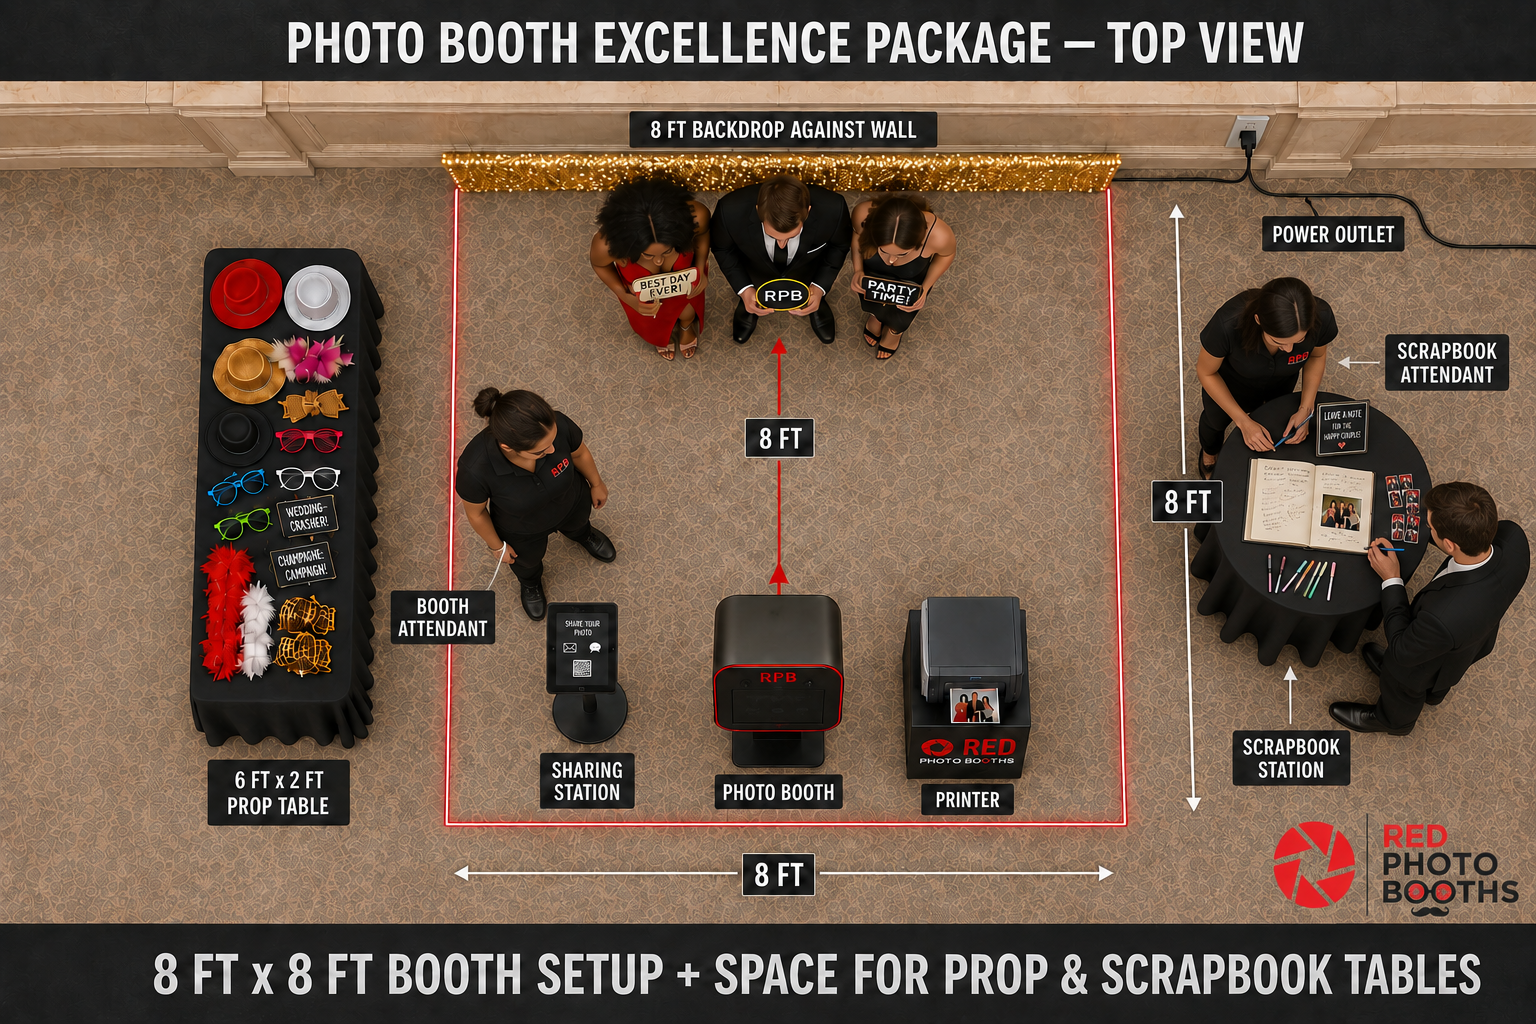
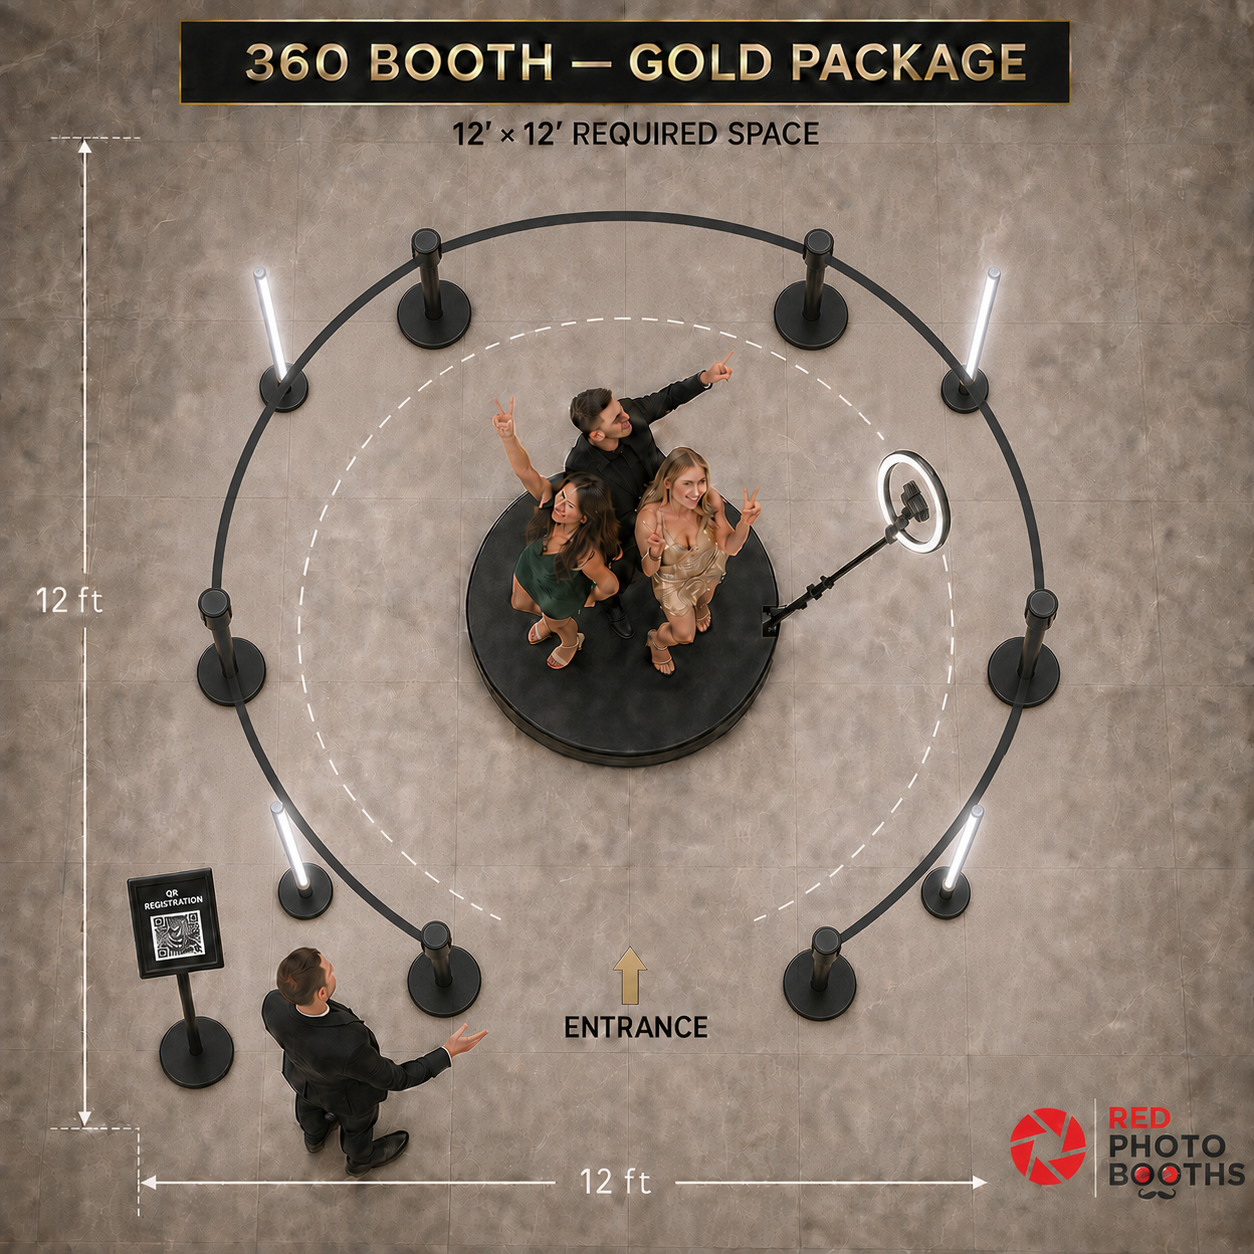
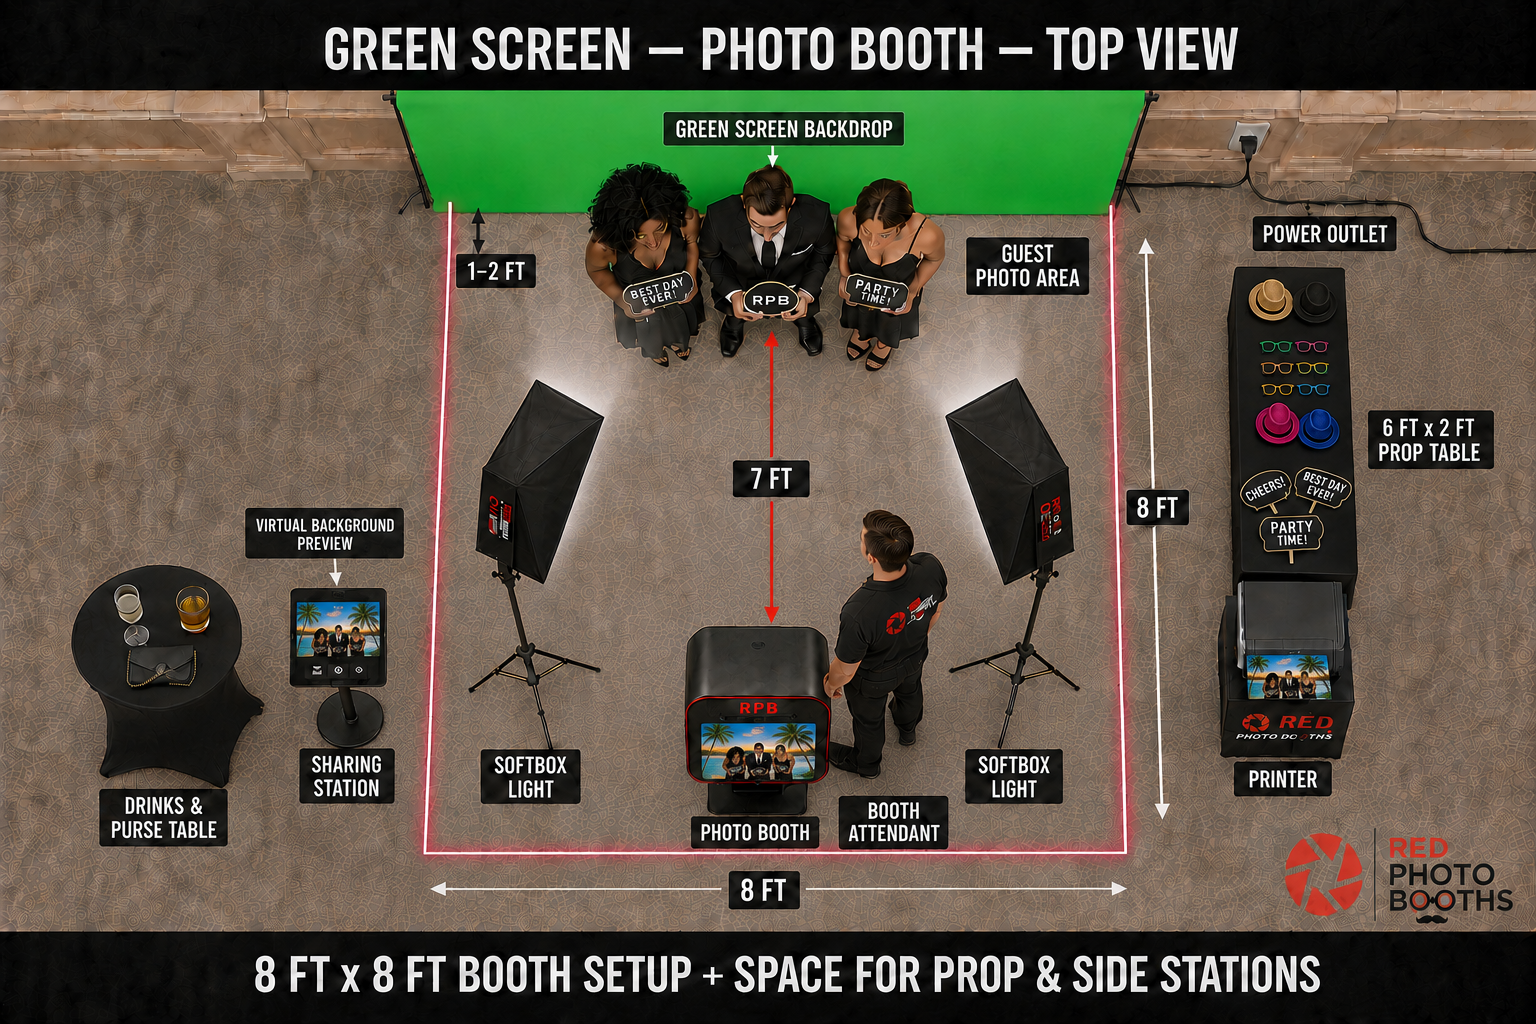
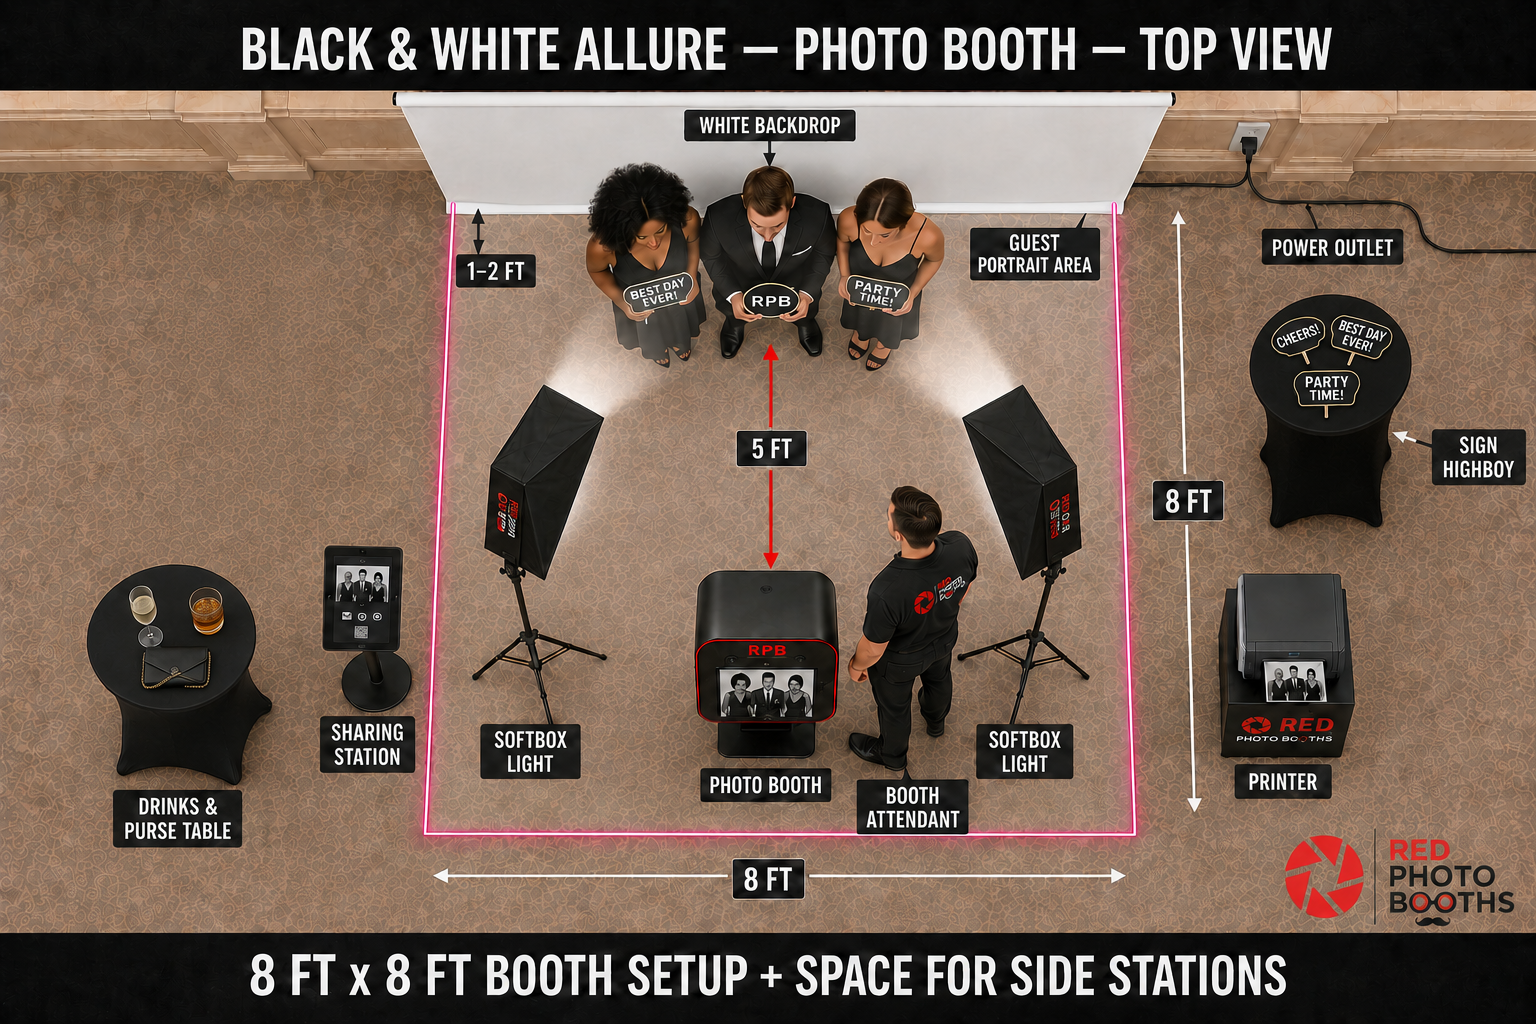
These top-view diagrams show the equipment zone and guest area for common packages. Select any diagram to open the full-size version. RPB will confirm the final layout for your event.
 View full diagram ↗
Allow additional room beside the core area for the prop table, printer, sharing station, and scrapbook station shown in the diagram.
 View full diagram ↗
Requires a level surface, controlled clearance around the rotating arm, a defined entrance, and a separate guest queue.
 View full diagram ↗
Allow additional side space for the sharing station, prop table, printer, guest belongings, and comfortable guest flow.
 View full diagram ↗
Allow additional side space for the sharing station, printer, sign highboy, guest belongings, and the guest queue.
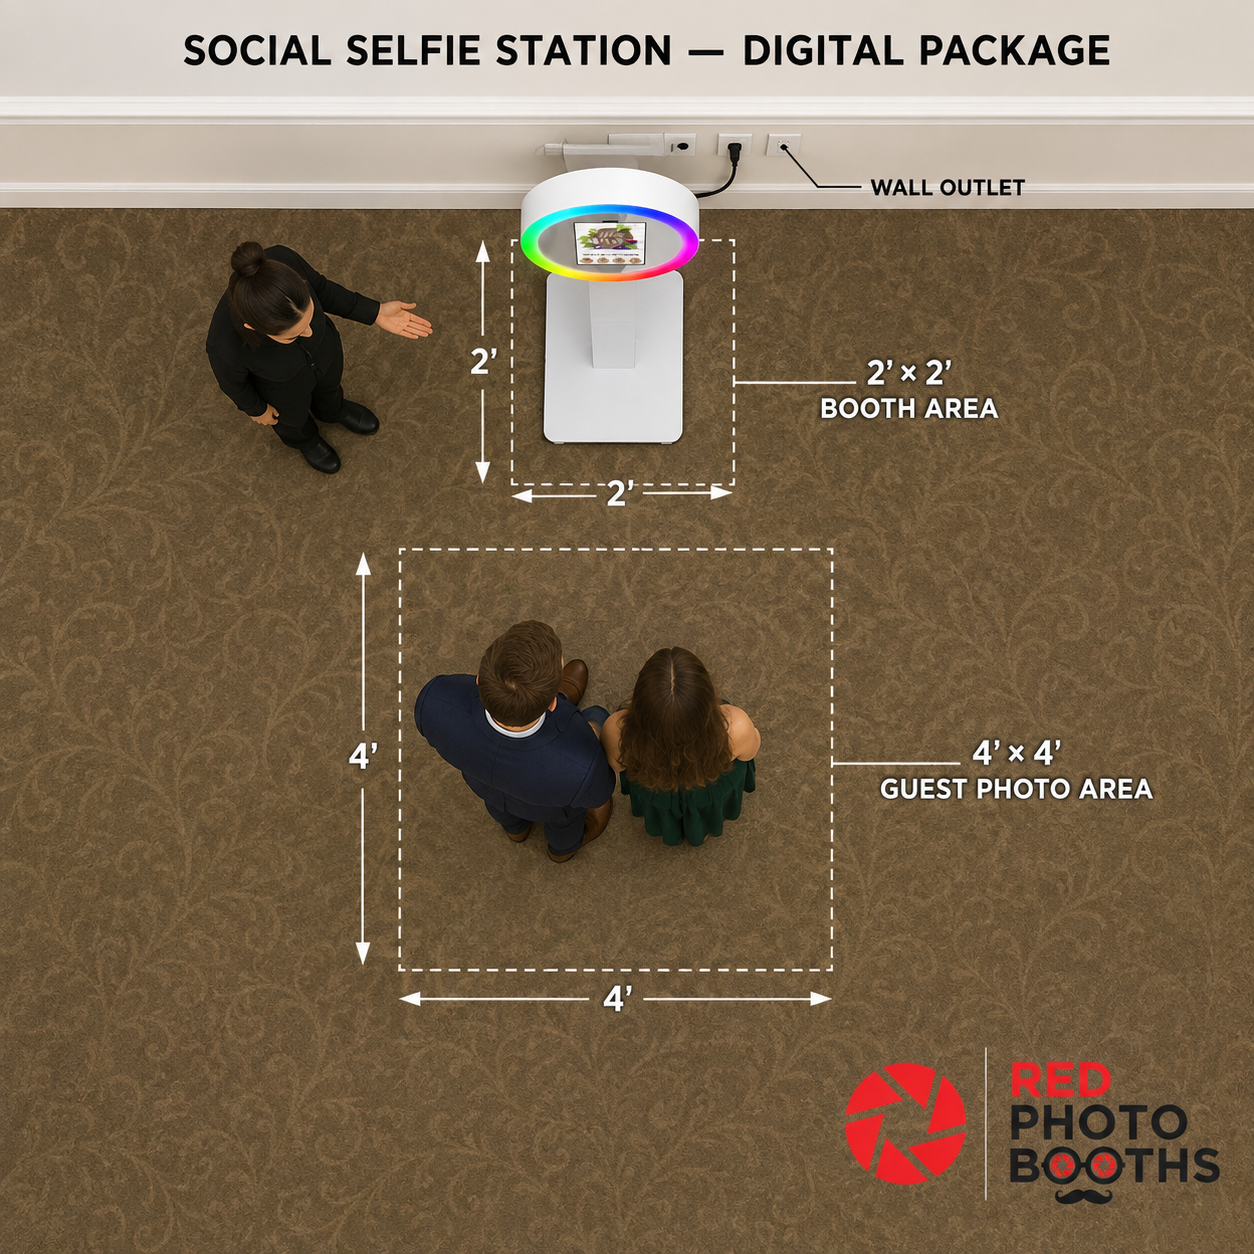 View full diagram ↗
Place the station near a grounded wall outlet and preserve the full guest photo area in front of the booth.
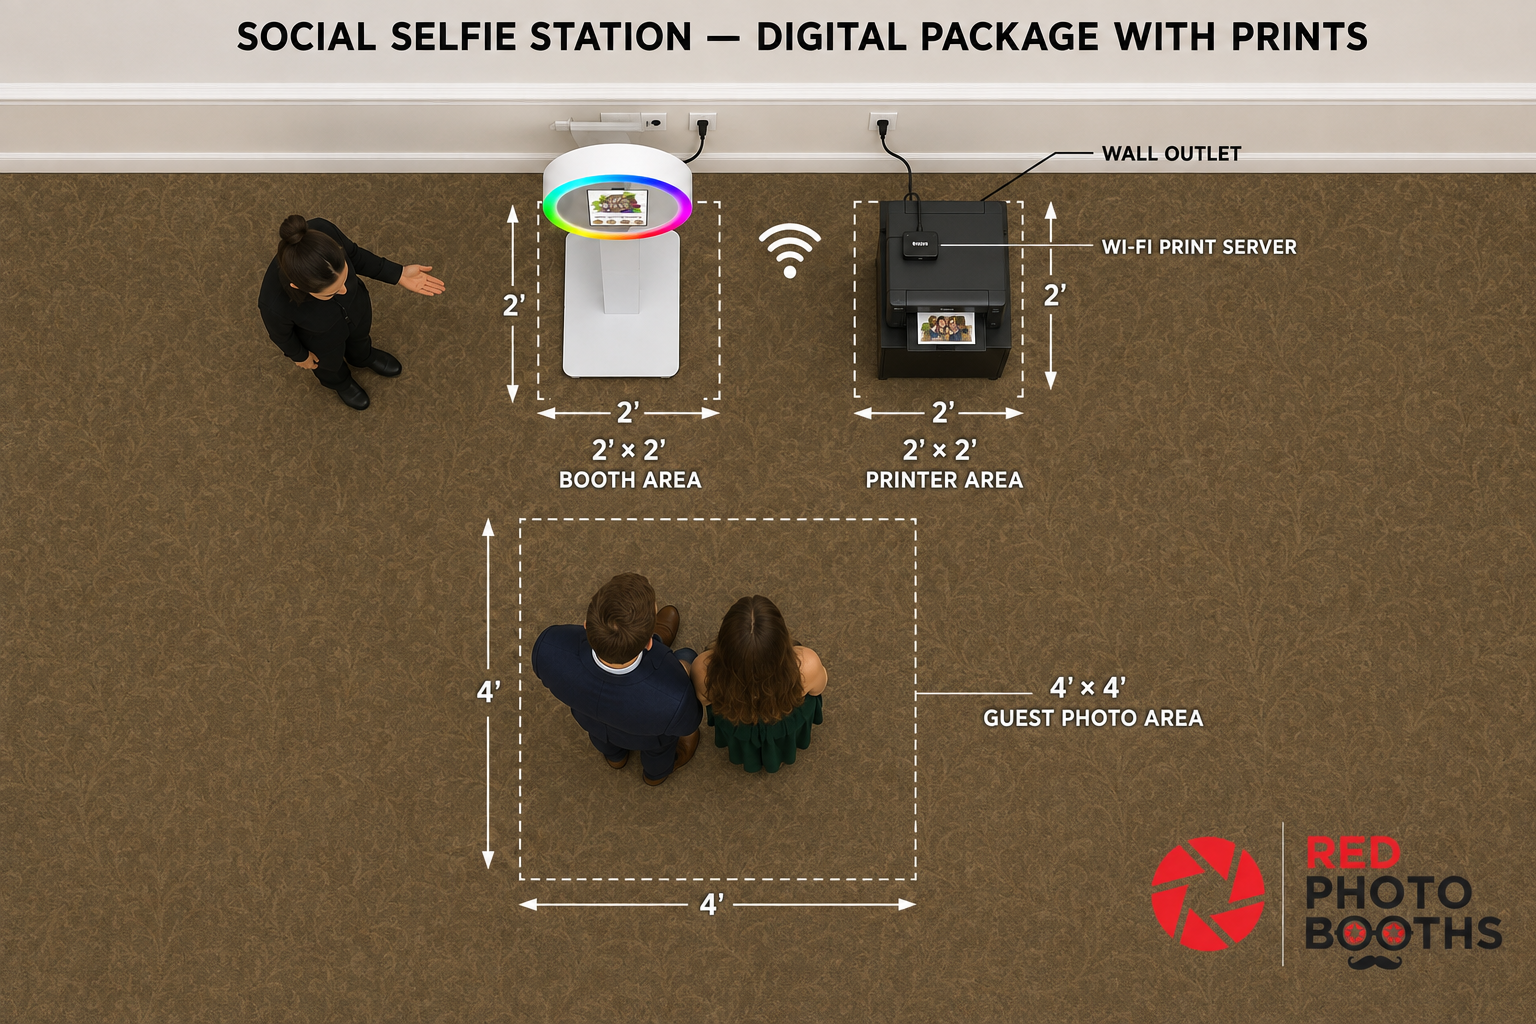 View full diagram ↗
The booth and wireless print server each need nearby grounded power, with the guest photo area kept clear.
Custom planning
These experiences are confirmed individually because the selected equipment, branding, venue, and guest-flow plan materially affect the final layout.
Backdrops, scenic elements, printers, sharing stations, guest group size, and branded structures can change the space required. RPB confirms the layout for the selected build.
Robotic movement, lighting, barriers, guest direction, and technical access require a venue-specific plan. RPB confirms the footprint before the event.
Additional depth may be required for wider groups, full-length portraits, step-and-repeat walls, multiple lights, or a check-in area.
Provide clear guest routes plus a secure staging and charging location for equipment, cases, batteries, and personal items.
Venue checklist
Outdoor events
Equipment assigned for indoor operation cannot be set up or relocated outdoors. If any portion of your event is planned for an outdoor area, please notify RPB during the planning phase so we can confirm the location and assign appropriate equipment.
Approved outdoor operation requires a flat, dry, protected surface; safe power; suitable temperature; and protection from rain, wind, direct sun, dust, and moisture. A tent alone may not provide adequate protection.
RPB may pause, relocate, or discontinue operation when conditions could endanger guests, staff, or equipment. Confirm an indoor backup location with your venue whenever possible.
Need a venue review?
Cheska can review placement, access, guest flow, and the selected experience with you or your venue contact.